
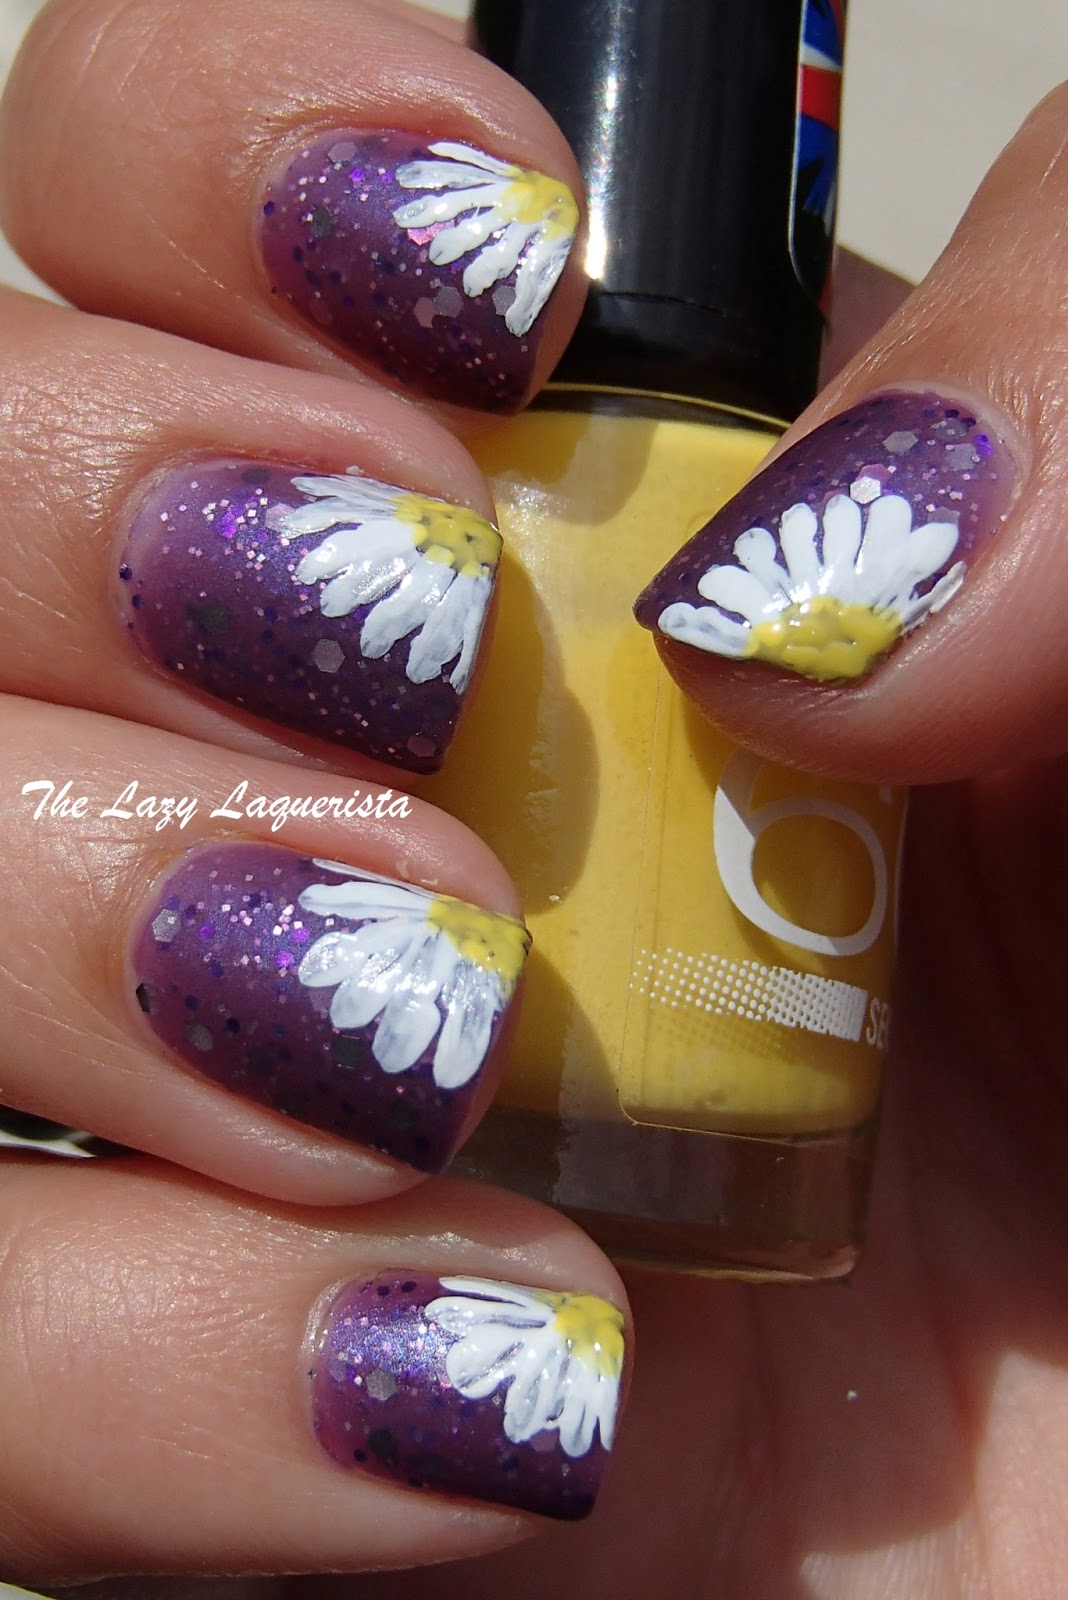
To do this mani you will need a base color, an opaque white creme, an opaque yellow creme, a matte top coat and a small thin brush.
 |
| Pipe Dream Polish Shot Through The Heart, Finger Paints Paper Mache, Rimmel Sunny Days, Julep Matte Top Coat |

Start off by putting as many coats of your base colour on as it takes to get opaque. Then add one coat of your favorite matte top coat.

Then using your brush leave a small gap in the upper corner of your nail and make a line pointing down towards the opposite bottom corner of your nail. Try to make this line a little wider on the outer end.

Continue adding more lines in this style up towards the top edge of your nail. Try to have the inner ends of the lines touch while leaving small gaps between the outer ends.

Continue adding more lines of this style towards the left edge of your nail.

Using the tip of your brush make yellow dots around the inner edge of your white petals.

Continue filling in the flower center with yellow dots.

Wait until your first layer of yellow dots is somewhat dry and then add another layer of dotting.

Continue until your are happy with the opacity of the yellow polish. Then repeat on the rest of your nails.

No comments :
Post a Comment