
Hi all,
Eithne from Tea & Nail Polish here taking over Michelle's blog today with my guest post - Smoke & Mirrors nail art tutorial.
I love those cutesy "holidays" that are completely made up yet seem to have a specific day, so when Michelle was looking for guest posts for this week, I consulted the cute holidays calendars to find a theme only to find that March 29th is Smoke & Mirrors Day. Now, the holiday is more about lies, illusions and trickery but that is a bit harder to show on your nails so I went for a more literal Smoke & Mirrors look.

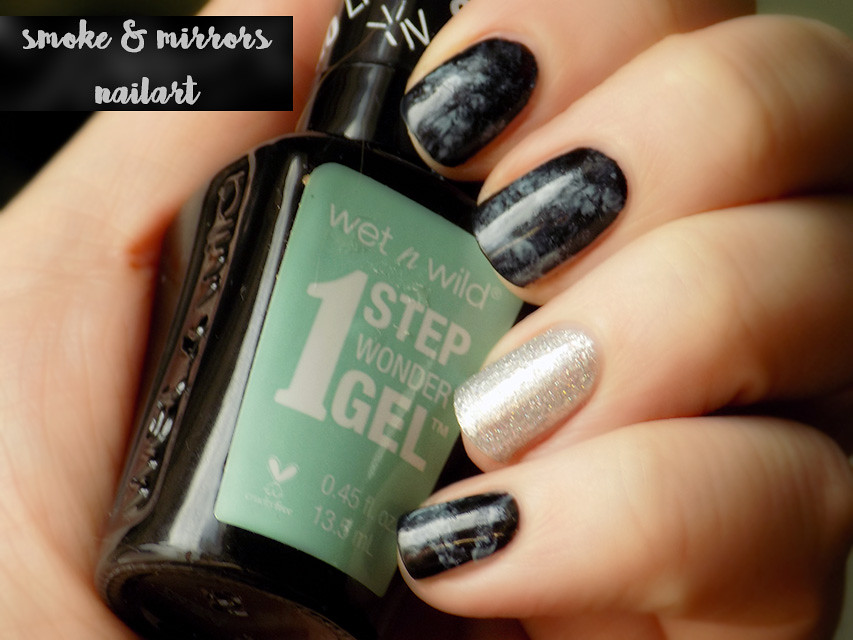
Now, you would think that white or grey polish would look better for smoke, but after trying a few times and not getting a look I loved, I decided to do some research and found that light green or blue toned polishes are best so I turned to Wet n Wild's new 1 Step Wonder Gel which I knew was not quick drying - essential for this look.
Here is what you will need for this Smoke & Mirrors nail art look
- Essence The Gel - Back to Black
- Wet n Wild 1 Step Wonder - Pretty Peas
- Lord & Taylor - unnamed silver
- Essence The Gel top coat
- Essence - Let The Stars Rain Down On Me! - effect coat
- Acetone in a small bowl (something you can dip a brush into)
- Small detailer brush and wider brush

Paint your nails with a black polish and add top coat. Let your nails dry completely, you will be adding acetone on top of the nail so if it is not dry, or you skip topcoat, your nails will be a mess. Dip your brush in acetone then your light green toned polish and make a few rough stripes where you want the smoke to be concentrated. While the green polish is still wet, take a larger brush, dip it in acetone and use it wet to dab gently at your green polish. You will see it start to dissolve and take on a smokey appearance.
Do not pat too many times or too hard or the acetone will start to break up the top coat layer. I tried a few on my trusty UberChic nail art mat before moving on to my nails.

You will still have some acetone on your nail so make sure it is completely removed and your smoke layer has dried before adding a layer of top coat. I had a bubble of acetone left on my nail and it dragged the polish when I applied top coat, still smokey looking, but not as perfect as the puffs of smoke.
Add an accent finger of a chrome or foil polish for your mirror. I needed a little sparkle so added Essence's holo top coat over a silver foil polish by Lord & Taylor for the mirrors part of the nail art look.
All nail images taken inside in natural daylight with one coat of Essence the Gel top coat.
Hope you enjoyed this post, Michelle will be back to her regular posts soon and you can visit me over at Tea & Nail Polish.
It's beautiful! I need to try this!
ReplyDeleteIt reminds me of sharpie marbles... but with polish+acetone instead of alcohol ink+rubbing alcohol.
Delete